This content was posted over 2 years ago and is most likely no longer
relevant.
I’ve mentioned a few times that I’ve had to service a locomotive in order to get it working. I also have several draft posts for each locomotive I’ve serviced but each of these posts reads pretty much the same with only the photos and names differing. Therefore I think it probably makes sense to write a single post outlining the way I do the servicing, as opposed to duplicating a post structure for each separate locomotive.
The logical first step to giving a locomotive a full service is to remove the decorative bits that can get damaged easily. This includes things like the body shells and any detailing parts present near wheels. Many of the locomotives have their body shells connected to their chassis by a few screws so removing them is relatively straightforward. This also lets me give these shells a quick clean so they look better when reattached.
Once the shells are removed, I can clean down electrical contacts and metallic parts with rubbing alcohol or similar. I have a small bottle of isopropanol alcohol (IPA) that I put in a bottle cap and use with a cotton bud to remove any caked on dirt. This removes any possible sources of electrical isolation for things such as motors and lights, and mainly involves spinning wheels underneath the cotton buds or wiping down larger electrical contacts. Sometimes this is all that is needed to improve the performance of a locomotive.
It’s recommended to do a more thorough clean of motors and gearboxes at least once a year if the model has been run quite significantly. Since many of these locomotives have not been run in quite some time, I thought it would be good to try and do this for them all anyway.
The older locomotives tend to have the ringfield-style motors (a small version seen above, partially opened) which are easy to take apart. The most important thing to do in here is to clean the brushes and commutator as these are the components that route electricity in the motor. Since they are moving parts that physically touch, they do build up grime. So far I’ve only gone as far as dipping the brushes in the IPA bottle cap and rubbing down the commutator with the cotton bud, but it cleans them up enough to get them going pretty steadily again.
A couple of the locomotives have had damaged gearing or loose parts. These have all been fixed with small amounts of epoxy glue and hopefully they will hold for the foreseeable future.
Before reassembling the locomotive, I will oil all the motion mechanisms. I do this by putting a small amount of oil in a container and using a paper clip to directly apply drops on important parts. The paperclip is metallic so the oil doesn’t seep into it like it would a toothpick for example, and it’s precise enough that I can apply just a drop as opposed to a massive blob. I’ve also used other stainless steel pins in the past where a paperclip didn’t work — the most memorable of these was the bent leg of a burnt-out LED, which was surprisingly efficient!
These techniques also work for non-locomotives. Old coaches with slightly seized wheels can be oiled the same way and their wheels can also be cleaned up as they can spread dirt around a layout. I’ve also got an old turntable with an ageing mechanism which I cleaned up somewhat. I’ve cleaned up the majority of the running fleet for the Guelder Valley layout and they mostly seem stable now asides from Cadbury Castle which struggles going forward and needs further work. I’ll have to take a closer look at this locomotive in the future.
The little shunter that could
This content was posted over 2 years ago and is most likely no longer
relevant.
In one of my earlier posts, I mentioned that I had one more damaged locomotive that I had yet to reveal. Truth be told, I wasn’t entirely sure I wanted to touch this one — it wasn’t in the best state and definitely not suited for the era that Guelder Valley is set in — but I’m genuinely glad I have now. While the repairs I’ve done on the other locomotives so far have been freeing up wheels, reattaching gears or fixing cosmetics, this one required quite a significant rebuild: let me introduce you to the little shunter that could: a British Rail Class 08/09.
When I was a younger nerdlet than I am now, my father took me to a model railway show. I can’t remember what year it was, or which country, but I seem to recall getting three significant pieces from the show: the locomotive shed, the Eurostar and rescuing what could only be described as a sacrificial model — that is to say, parts had been taken from it to repair other models. The person who gave it to me probably thought I was crazy when I took it off his hands but back then I thought I could repair it. However it soon became apparent that I didn’t have the skills. It sat in a box in several pieces as I grew up and forgot about it.
With the rebuild of Guelder Valley put on hold due to the current crisis, I decided to take a closer look at the model. After all, many years had passed; I must have the skills to fix it by now… right?
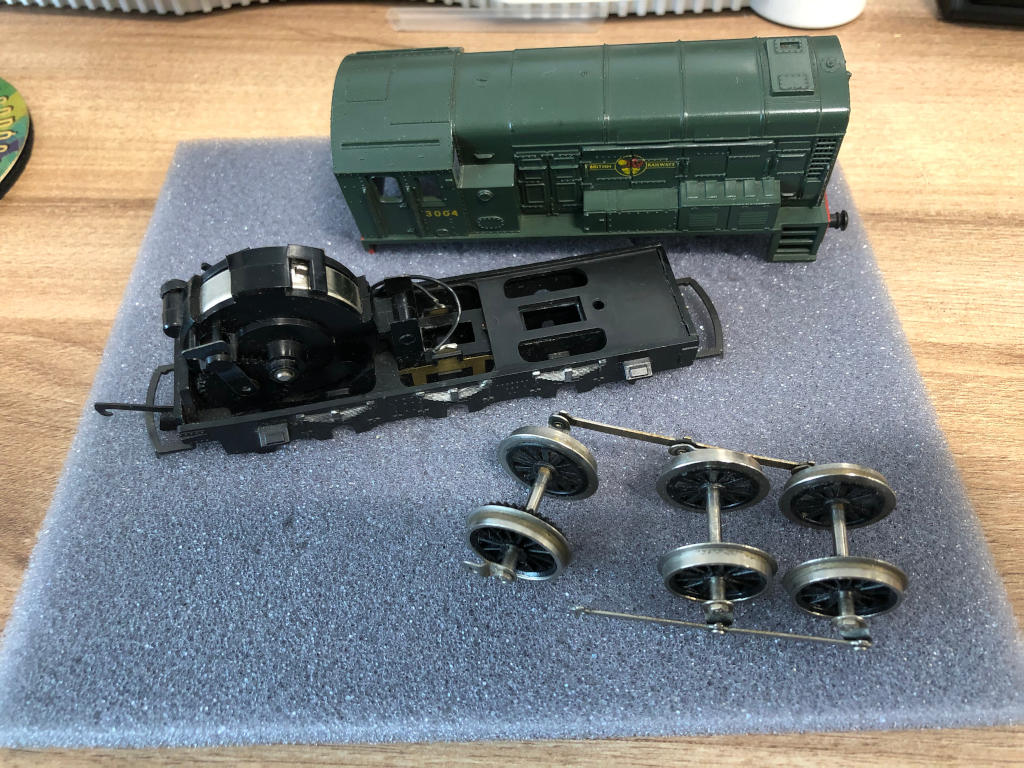
Twenty-or-so years in storage had put a solid layer of dirt on the shell and oxidised the wheels somewhat — but what was there was at least in good shape, all things considered.
The most logical place to start would be to see if there were service sheets for the model. But what make was it? What locomotive class? I fired up my favourite search engine and typed in the little I knew about the model: “BR 0-6-0 diesel”. The first few results confirmed that this was either a Class 08 shunter or the similarly-designed Class 09. But which company made it?
Model locomotives usually have the company name printed on the bottom. Unfortunately, it appears that the bottom of this locomotive had been part of the sacrifices — there was nothing there to hold the wheels in or that I could use to work out who the manufacturer was. I went back to the search engine.
Turns out most of the major manufacturers who create models in this this scale have made a model Class 08. I ruled out the Bachmann products as they were far too detailed. Hornby have made quite a few models of the Class 08, but none of theirs seemed to match. Dapol make theirs in a different scale. I’d come up with nothing and was worried that perhaps I might not be able to do this “to spec” so to speak.
I wasn’t going to give up, though. Not sure where to start, I looked for the easiest things that could be done with minimal guidance. The most straight-forward was to reconnect the coupling rod to the wheels — in the photo above, you can see the rear wheels are not connected at all to one side. The process was actually quite straightforward: I took an old panel pin, clipped off the end using bolt cutters and glued it to the coupling rod connector.
This fix seemed good enough, but it wouldn’t stop the wheels falling out the bottom of the chassis. With renewed confidence, I pulled out my callipers and took a whole bunch of measurements of the bottom of the locomotive. With a sheet of A4 paper covered in numbers and scribbles, I opened up TinkerCAD, a 3D modelling program.
After a few hours of designing and refining, I put the design on my 3D printer and created the first draft of the bottom chassis. It fit pretty well — screw holes were correct and it didn’t obstruct anything. Unfortunately, it wasn’t very secure: the screw holes in the upper chassis are slightly recessed and since I wanted to keep the design free from the wheels, there was about half a millimetre of wiggle room. I went back to the drawing board.
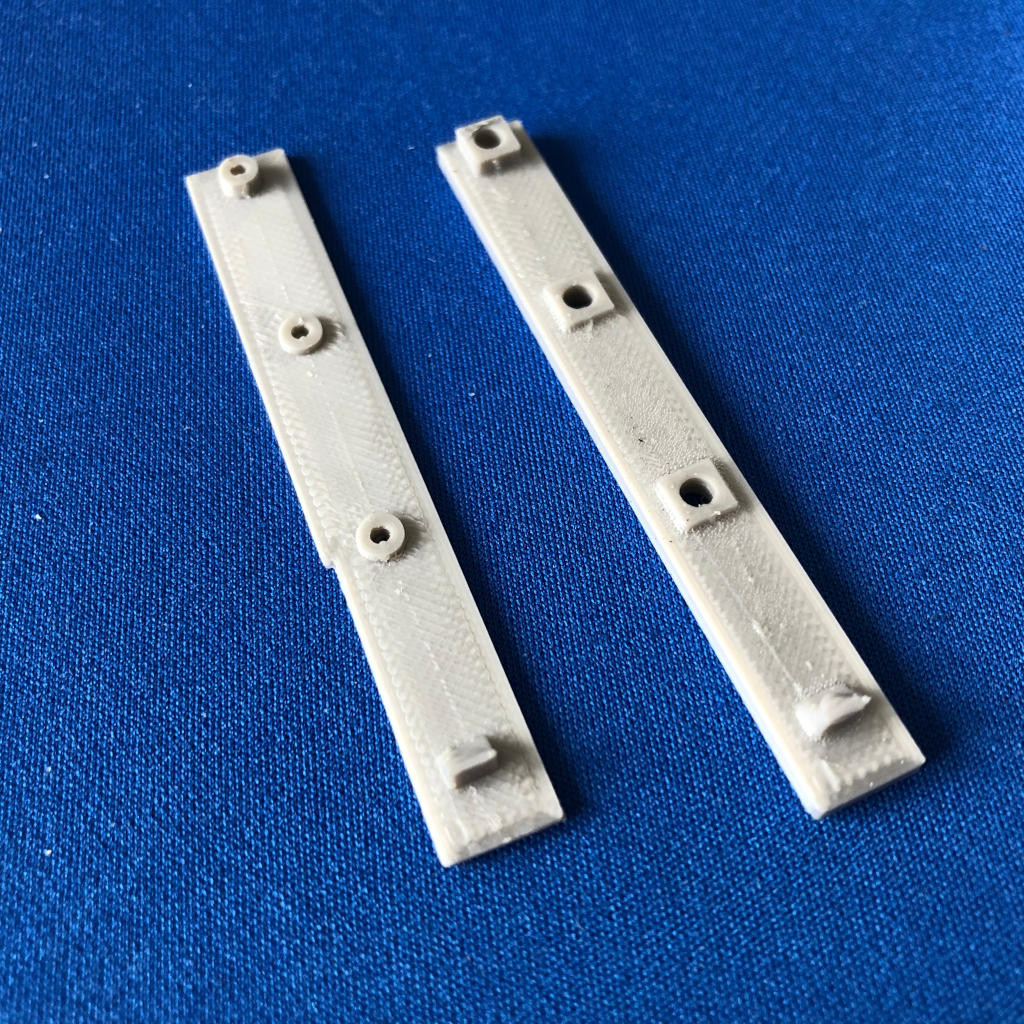
It took me a few more attempts to get the size correct and movement-free. I’d noticed the upper chassis had a square hole near the back which I decided to use as an anchor, so I placed a raised wedge on on that part of the design. The first revision used rounded screw supports but was far too thin and ended up snapping when attached — this is the left one in the photo above. The second revision was thicker and used square screw supports to make it easier to print — pictured on the right of the photo. This proved to be a much better fit and I was planning to use this one until I realised I could cover a larger part of the axles by adding small lips to each side of the design where the wheels were. Using the second revision, I measured out the locations of the axles and went back to TinkerCAD.
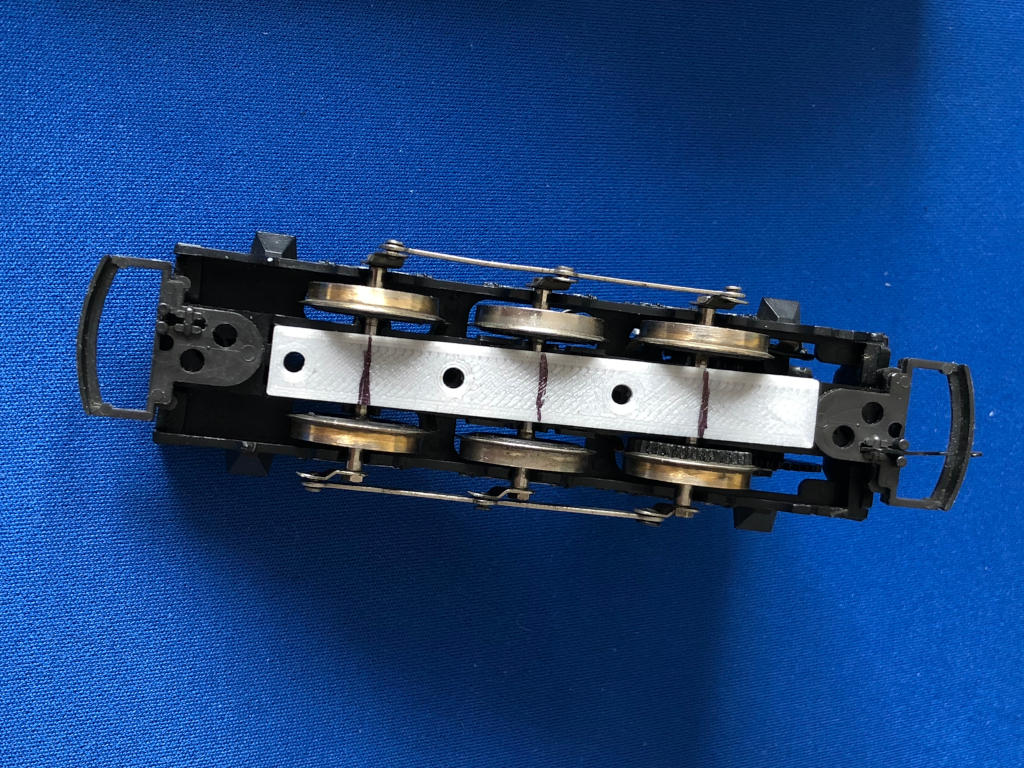
This new revision had the added benefit of interlocking with grooves on the upper chassis to prevent any sort of wiggling, as well as covering the exposed areas of the axles and preventing any lubricant from dripping onto the track below while the locomotive was running.
At this point, I’d been looking at a spares website to get a digital blanking board for the Peppercorn A1 ‘Tornado’ when I noticed a spare Lima motor that looked exactly the same as the one on this model. I hadn’t considered that an Italian model railway company would have made British locomotives, but it turns out that this is a Lima Class 09 model! Unfortunately, Lima became part of Hornby many years ago and spares for the models they released before merging are hard to find. I was able to purchase some new buffers for the locomotive which I’ve applied, but couldn’t find many more spares.
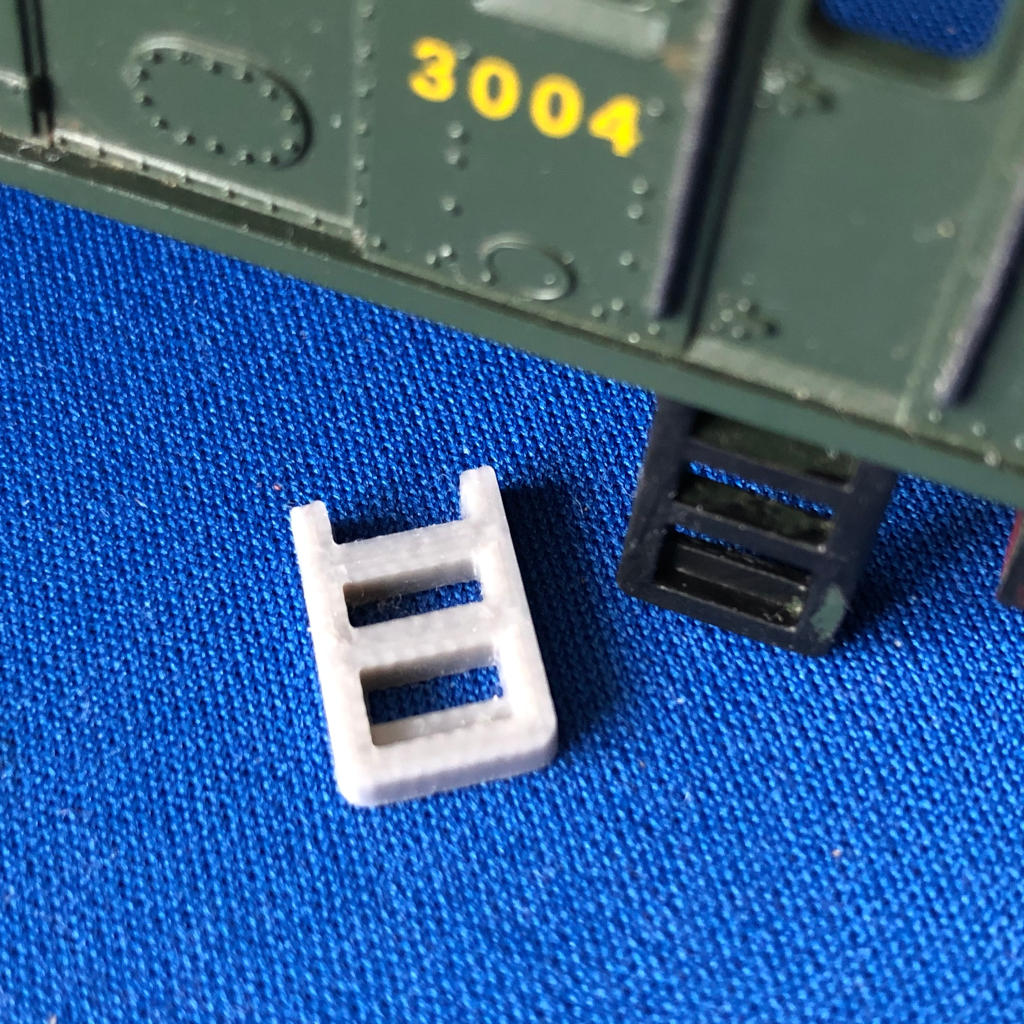
Now that the wheels were back in the chassis and I knew the manufacturer, I took a look at the cosmetics on the model. One side of the cab had a missing ladder. This was pretty straightforward to design in TinkerCAD and I printed this out and applied it straight away, no revisions needed. I gave the model some detailing paints and looked to the final hurdle: getting the motor running.
With the wheels back in, the motor was able to pick up power from the rails again. Unfortunately, this simply made loud grinding sounds. Gearing between the motor and wheels was missing, as well as the TV suppressor. Fortunately, I have a set of capacitors on hand and was able to fashion a Hornby-style TV suppressor with a bit of soldering. The gear, however, was more difficult.
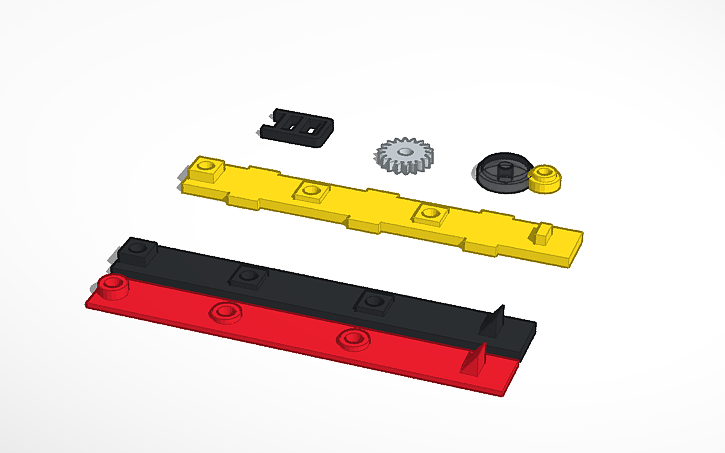
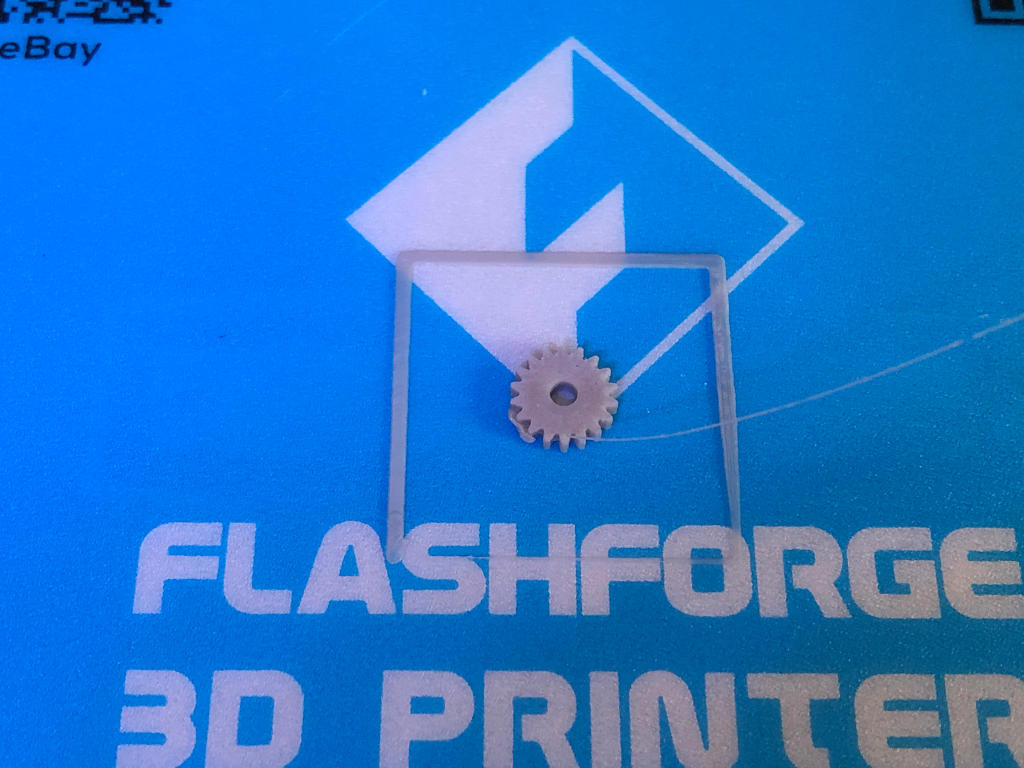
I’d read somewhere that the Lima gears that were used had either 19 or 20 teeth so I started from there and worked backwards. I measured every dimension possible — the motor gear dimensions, the size of the axles, the length of the gear teeth on the existing gears to name but a few. It took me several hours of poking things with callipers and pretending to do maths to end up with an absolute maximum and minimum diameter of gear that I would need. Fortunately for me, TinkerCAD provides a means for creating a gear from a number of required teeth, so I scaled that down to get a gear I was even remotely confident would print and fit. I didn’t expect much from the first draft, so I was actually quite surprised that it fit perfectly first try.
Of course, perfect fit means nothing if the motor isn’t back in the chassis, and I will admit that when reassembling the motor, I sent one of the washers pinging across the room by accident and had to crawl around with a magnet to find it again. With that excitement out of the way, I placed the body shell back on and prepared to witness either the greatest moment of this year… or the most disappointing.
Suffice to say, that’s quite the positive result!
What a difference a Saturday makes!
This content was posted over 2 years ago and is most likely no longer
relevant.
I’ve had a busy day today!
First and foremost, the upper frame is complete. My hands and arms are pretty numb right now, but the baseboard is connected to the wooden frame that I showed in the previous baseboard update on March 8th. I now have to think about raising the entire platform on legs, but that’s a job for another day.
I’ve also completed all the repairs I can do to the Duke of Gloucester model. The new body shell had already been applied earlier this week, but I’ve also had a chance today to strengthen the valve gear mechanism with some washers and replace the front bogie. It still wiggles when running on straights, but it definitely feels a lot smoother overall now. It’s come a long way since its first photo!
Before
After
Finally, I’ve started trying to get the Robert the Devil model back up and running, with mixed results. It now runs but occasionally sounds like something is grinding. I’ve had the bottom of the locomotive off and oiled all the bearings, but it’s not had any major effect so far. I’ll keep trying though.
Update on the Duke’s repairs
This content was posted over 2 years ago and is most likely no longer
relevant.
When I first purchased the Duke of Gloucester model, the previous owner advised me that it had missing buffers. The front right buffer was crushed and one of the rear tender buffers was missing. After a while of having it, I noticed that part of the valve gear mechanism that connects to the middle driving wheel was missing as well. This causes the connecting rods between the wheels to wiggle a lot when moving and may be contributing to the overall locomotive’s uneven movement.
Initially, I thought I could repair these myself. I managed to straighten up the metal parts of the crushed front buffer and started looking at paints to ensure the colours matched when put back on. I’d got pretty close and was ready to glue it back in. I’d also managed to get a sacrificial valve gear mechanism from an online store to take parts from to try and at least stabilise the Duke’s mechanism somewhat.
Unfortunately if you look closely at the locomotive’s body, there’s a lot of detailing damage. The handrails are completely loose from the body and seem to be held on only by willpower, the whistle is missing and there are odd white marks all over the place. I’d taken the body off (like I have done with the Tornado) in preparation for some serious work, when I saw this for sale.
I’m not one to quit things like this, but you’ll notice that this body is different from the one in the image at the beginning of this article. That’s because it’s from a higher-detail model — a non-RailRoad variant of the Duke of Gloucester. Hornby’s RailRoad range is aimed at people new to the hobby and will be cheaper, but due to this are simpler and lack detailing. The interesting thing about Hornby’s Duke of Gloucester models is that the RailRoad and non-RailRoad variants only differ by the locomotive body. Due to this, I didn’t hesitate to pick up the higher detail body to replace the damaged one with, especially since these are harder to find. I’ve put the replacement body onto the chassis now and am keeping the damaged one to work on, on the off chance I can use my artistic skills to make it look even better than the replacement one.
There’s a few other repairs I have lined up for this model, which I’ll be doing in the future, but after this replacement I think the Duke is one of the most spectacular-looking locomotives in my fleet.
Small gust: Peppercorn A1 “Tornado” update
This content was posted over 2 years ago and is most likely no longer
relevant.
I’ve had a little time to work on the Peppercorn A1 “Tornado” today, after some of the spare pieces I ordered arrived.
I’ve managed to straighten out the bent front beam by submerging the front of the locomotive in boiling water and pulling it forward. I’ve also replaced the shattered buffers with new ones and added on a detailing pack so it looks a bit more like the real locomotive. I now need to 3D print a replacement front ladder, give it a quick lick of paint and it should be OK to go again!