This content was posted over 2 years ago and is most likely no longer
relevant.
The Class 09 shunter I rebuilt has had a few more tweaks added to it now it’s working properly again.
First off, I’ve put some weight into the locomotive — more weight means there is less likely to be any wheel spin when pulling larger loads. Since the model is mostly plastic, it doesn’t weigh much at all. Originally, it had a solid lump of lead placed inside it to weigh it down but this doesn’t exist in my model — and besides, lead is toxic. I picked up a pack of iron car wheel weights and placed a bunch inside. There’s now an additional 45g of weight just above the wheels.
The second change is that I’ve put in window glazing which gives a more realistic appearance to the cab.
The little shunter that could
This content was posted over 2 years ago and is most likely no longer
relevant.
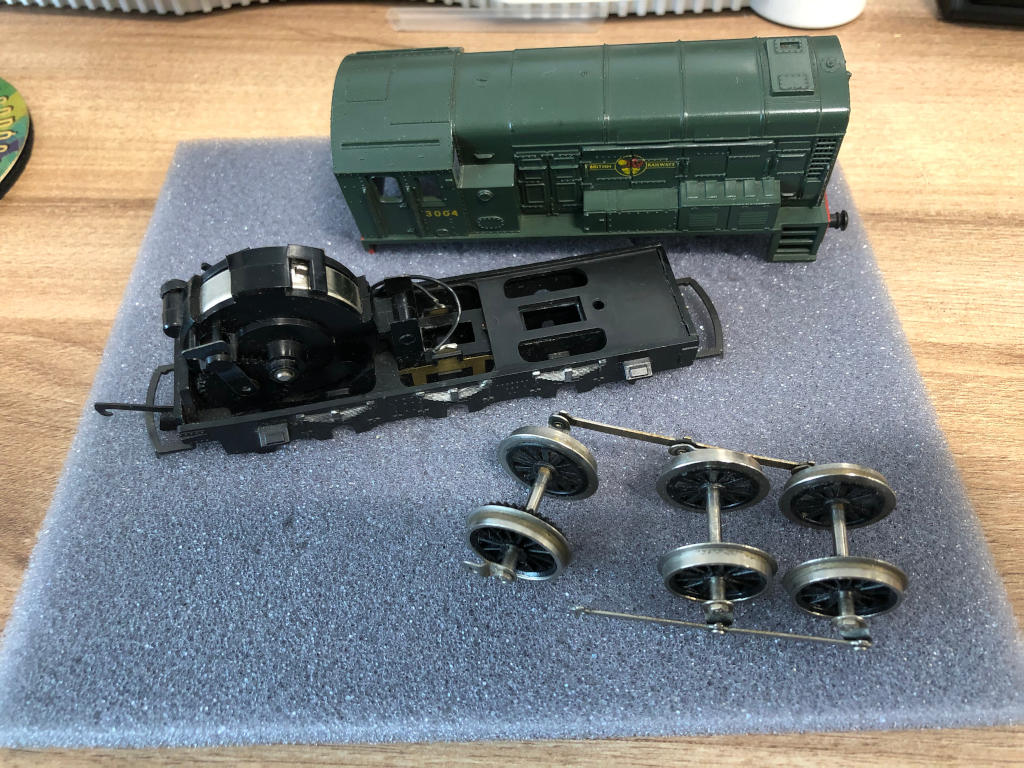
In one of my earlier posts, I mentioned that I had one more damaged locomotive that I had yet to reveal. Truth be told, I wasn’t entirely sure I wanted to touch this one — it wasn’t in the best state and definitely not suited for the era that Guelder Valley is set in — but I’m genuinely glad I have now. While the repairs I’ve done on the other locomotives so far have been freeing up wheels, reattaching gears or fixing cosmetics, this one required quite a significant rebuild: let me introduce you to the little shunter that could: a British Rail Class 08/09.
When I was a younger nerdlet than I am now, my father took me to a model railway show. I can’t remember what year it was, or which country, but I seem to recall getting three significant pieces from the show: the locomotive shed, the Eurostar and rescuing what could only be described as a sacrificial model — that is to say, parts had been taken from it to repair other models. The person who gave it to me probably thought I was crazy when I took it off his hands but back then I thought I could repair it. However it soon became apparent that I didn’t have the skills. It sat in a box in several pieces as I grew up and forgot about it.
With the rebuild of Guelder Valley put on hold due to the current crisis, I decided to take a closer look at the model. After all, many years had passed; I must have the skills to fix it by now… right?
Twenty-or-so years in storage had put a solid layer of dirt on the shell and oxidised the wheels somewhat — but what was there was at least in good shape, all things considered.
The most logical place to start would be to see if there were service sheets for the model. But what make was it? What locomotive class? I fired up my favourite search engine and typed in the little I knew about the model: “BR 0-6-0 diesel”. The first few results confirmed that this was either a Class 08 shunter or the similarly-designed Class 09. But which company made it?
Model locomotives usually have the company name printed on the bottom. Unfortunately, it appears that the bottom of this locomotive had been part of the sacrifices — there was nothing there to hold the wheels in or that I could use to work out who the manufacturer was. I went back to the search engine.
Turns out most of the major manufacturers who create models in this this scale have made a model Class 08. I ruled out the Bachmann products as they were far too detailed. Hornby have made quite a few models of the Class 08, but none of theirs seemed to match. Dapol make theirs in a different scale. I’d come up with nothing and was worried that perhaps I might not be able to do this “to spec” so to speak.
I wasn’t going to give up, though. Not sure where to start, I looked for the easiest things that could be done with minimal guidance. The most straight-forward was to reconnect the coupling rod to the wheels — in the photo above, you can see the rear wheels are not connected at all to one side. The process was actually quite straightforward: I took an old panel pin, clipped off the end using bolt cutters and glued it to the coupling rod connector.
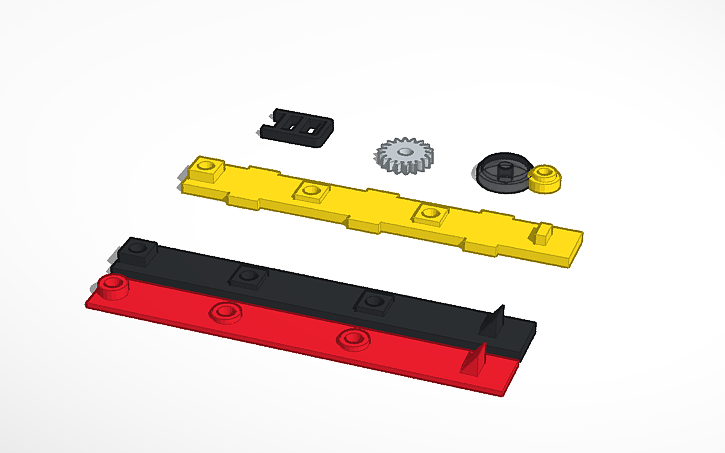
This fix seemed good enough, but it wouldn’t stop the wheels falling out the bottom of the chassis. With renewed confidence, I pulled out my callipers and took a whole bunch of measurements of the bottom of the locomotive. With a sheet of A4 paper covered in numbers and scribbles, I opened up TinkerCAD, a 3D modelling program.
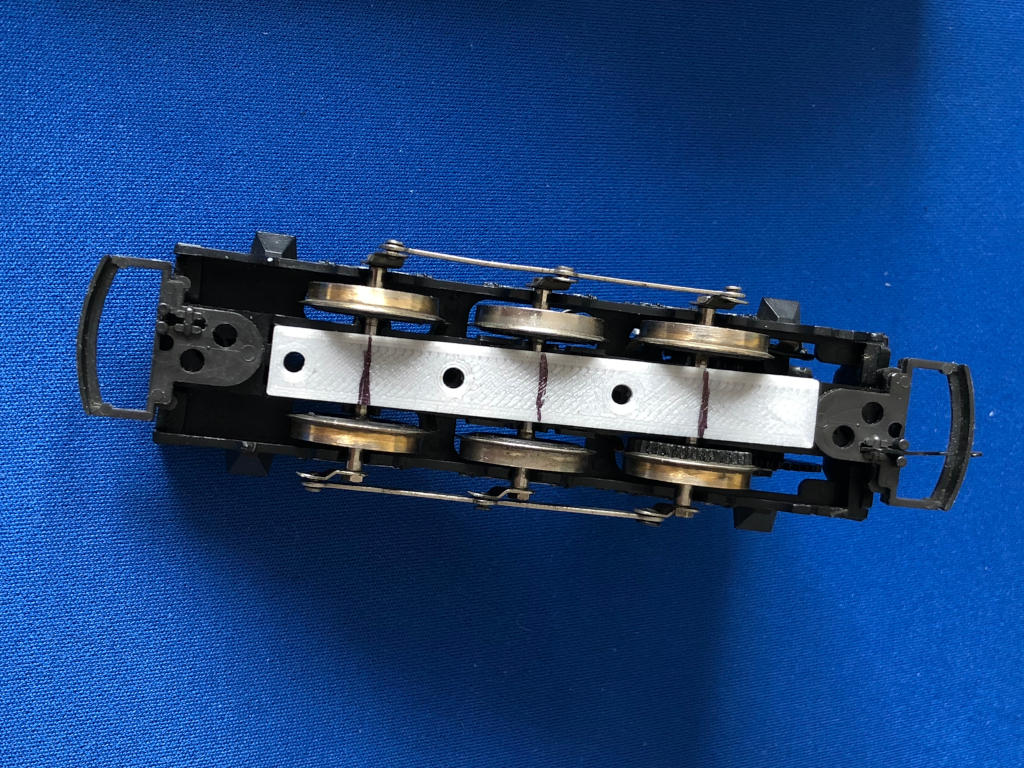
After a few hours of designing and refining, I put the design on my 3D printer and created the first draft of the bottom chassis. It fit pretty well — screw holes were correct and it didn’t obstruct anything. Unfortunately, it wasn’t very secure: the screw holes in the upper chassis are slightly recessed and since I wanted to keep the design free from the wheels, there was about half a millimetre of wiggle room. I went back to the drawing board.
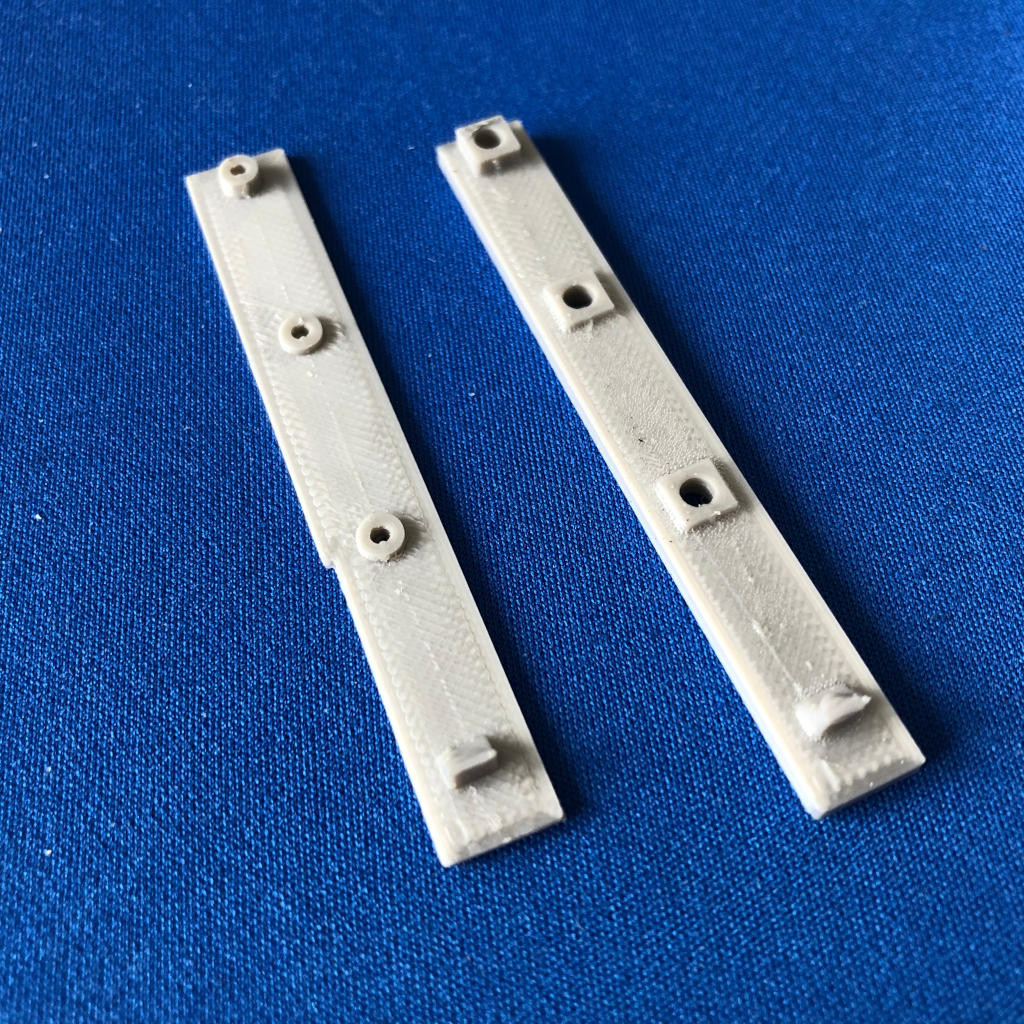
It took me a few more attempts to get the size correct and movement-free. I’d noticed the upper chassis had a square hole near the back which I decided to use as an anchor, so I placed a raised wedge on on that part of the design. The first revision used rounded screw supports but was far too thin and ended up snapping when attached — this is the left one in the photo above. The second revision was thicker and used square screw supports to make it easier to print — pictured on the right of the photo. This proved to be a much better fit and I was planning to use this one until I realised I could cover a larger part of the axles by adding small lips to each side of the design where the wheels were. Using the second revision, I measured out the locations of the axles and went back to TinkerCAD.
This new revision had the added benefit of interlocking with grooves on the upper chassis to prevent any sort of wiggling, as well as covering the exposed areas of the axles and preventing any lubricant from dripping onto the track below while the locomotive was running.
At this point, I’d been looking at a spares website to get a digital blanking board for the Peppercorn A1 ‘Tornado’ when I noticed a spare Lima motor that looked exactly the same as the one on this model. I hadn’t considered that an Italian model railway company would have made British locomotives, but it turns out that this is a Lima Class 09 model! Unfortunately, Lima became part of Hornby many years ago and spares for the models they released before merging are hard to find. I was able to purchase some new buffers for the locomotive which I’ve applied, but couldn’t find many more spares.
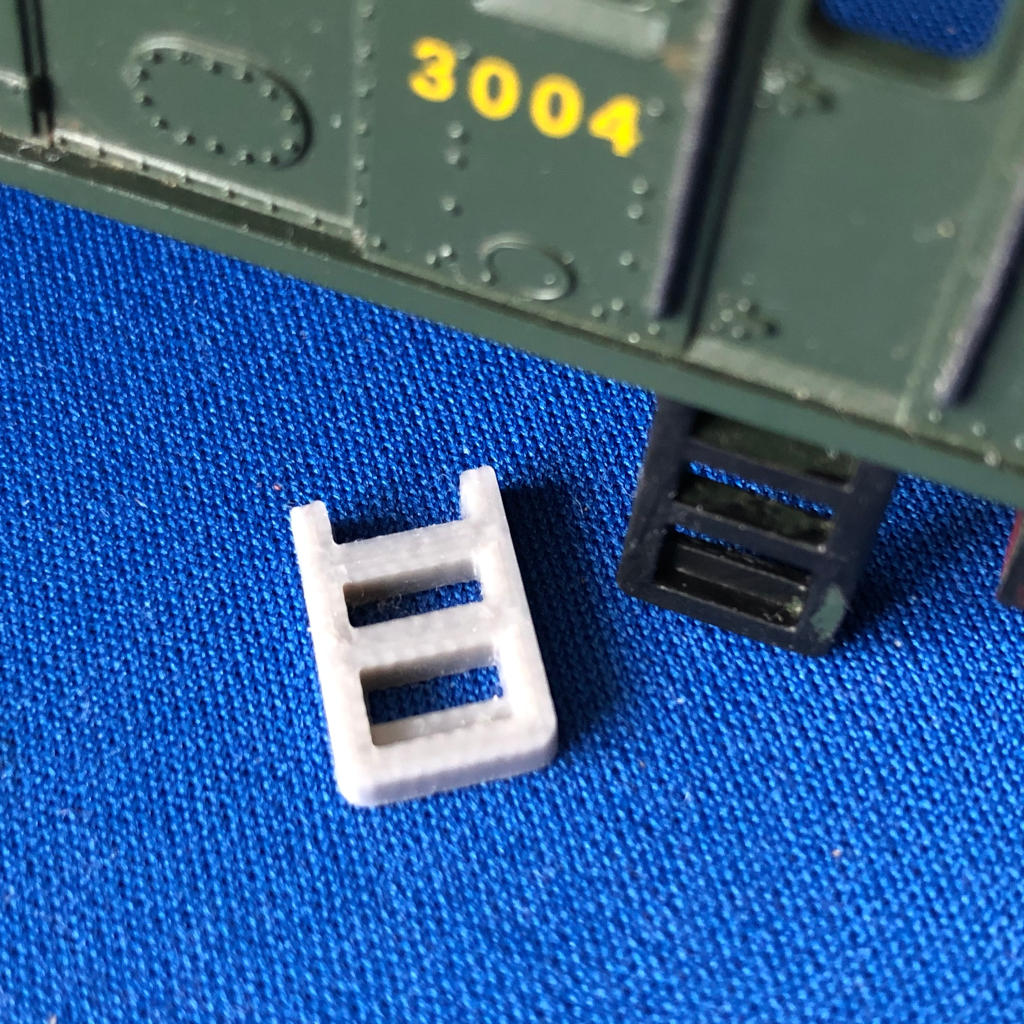
Now that the wheels were back in the chassis and I knew the manufacturer, I took a look at the cosmetics on the model. One side of the cab had a missing ladder. This was pretty straightforward to design in TinkerCAD and I printed this out and applied it straight away, no revisions needed. I gave the model some detailing paints and looked to the final hurdle: getting the motor running.
With the wheels back in, the motor was able to pick up power from the rails again. Unfortunately, this simply made loud grinding sounds. Gearing between the motor and wheels was missing, as well as the TV suppressor. Fortunately, I have a set of capacitors on hand and was able to fashion a Hornby-style TV suppressor with a bit of soldering. The gear, however, was more difficult.
I’d read somewhere that the Lima gears that were used had either 19 or 20 teeth so I started from there and worked backwards. I measured every dimension possible — the motor gear dimensions, the size of the axles, the length of the gear teeth on the existing gears to name but a few. It took me several hours of poking things with callipers and pretending to do maths to end up with an absolute maximum and minimum diameter of gear that I would need. Fortunately for me, TinkerCAD provides a means for creating a gear from a number of required teeth, so I scaled that down to get a gear I was even remotely confident would print and fit. I didn’t expect much from the first draft, so I was actually quite surprised that it fit perfectly first try.
Of course, perfect fit means nothing if the motor isn’t back in the chassis, and I will admit that when reassembling the motor, I sent one of the washers pinging across the room by accident and had to crawl around with a magnet to find it again. With that excitement out of the way, I placed the body shell back on and prepared to witness either the greatest moment of this year… or the most disappointing.